1. Log onto SCANNELL using your User Name & Password.
2. Find the appropriate Incident in the database using the Menu options in the View panel on the right hand side.
a. Workspace displays any incidents, actions & tasks assigned to you (the user). Overdue actions & tasks are also displayed on the START (welcome) page.
b.
Search for Incidents allows you to search based on various search
criteria – use the scroll bar on the right of the page to see the results which
are displayed on the lower part of the page.
|
|
If you were notified of an Incident, Action or Task by email you can click on the link in the message and this will take you straight to the item after log on. |
3. Click
on the Incident Id to open it.
Scroll to the bottom of the page and
there will be 3 options: Create Preventive Action (PA), Create Corrective
Action (CA), or Associate With Existing Action.
|
|
Typically a CA is reactive and is aimed at rectifying something that has already happened. A PA on the other hand is proactive and is based on the need to take action to eliminate the potential causes of non-conformances.
One or more CAPAs can be raised against an incident.
If necessary CAPAs can be broken down further into tasks where a number of people may be responsible for taking the necessary actions.
It is also possible to create Preventive Actions from trends of incidents. Click on "Trend Incidents" in the main menus. Incidents can be filtered in a number of ways to allow a trend of incidents to be reviewed. These trends can be established over specific time periods, for specific basic (root) causes, by incident type or subtype or by Department - at a minimum an "Incident Type" or "Subtype" or "Basic Cause" and date range must be selected. In order to see the trend, press the "Preview" button and the results are displayed in the table below (a graph can be displayed by clicking GO), then in order to create a PA press "Next" and enter the details required. |
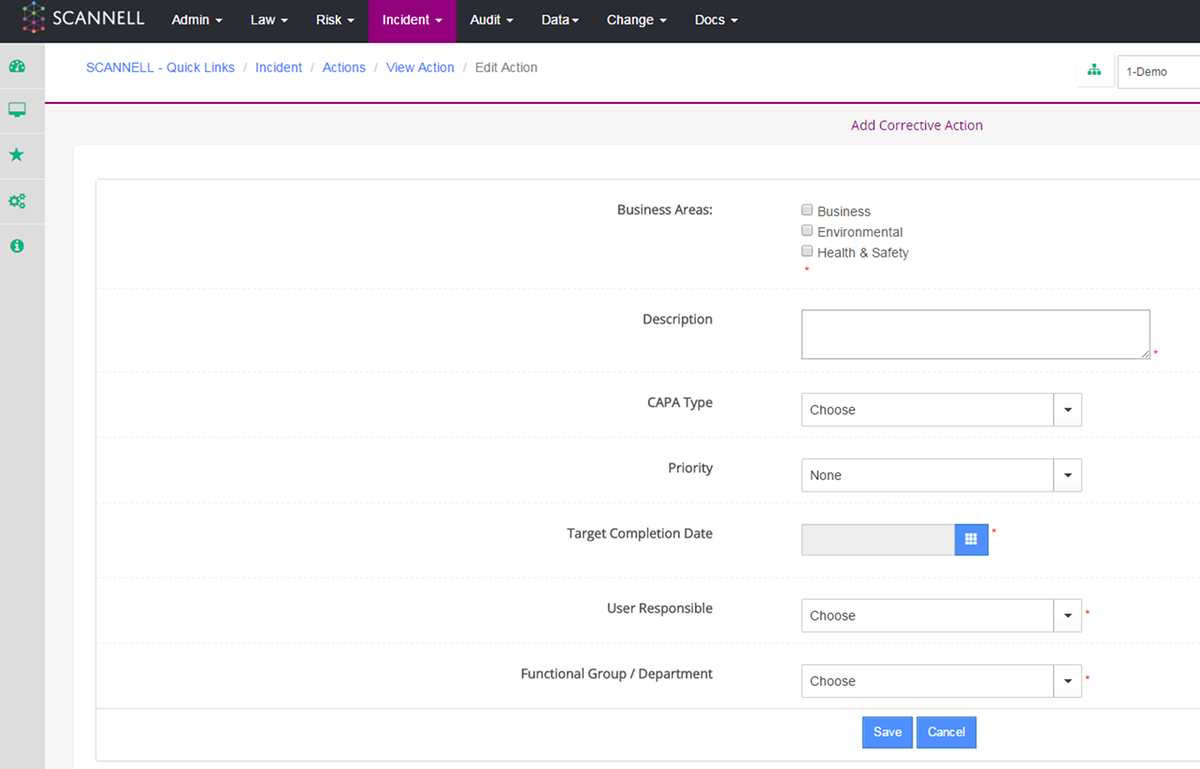
4. For a new Action enter a Description, CAPA type (this is optional and can be left blank), Priority (optional), Target Completion Date, Person Responsible and Functional Group / Department.
5. To add a Task to an Action click on the Add Task link under the Action details. Enter a Description, Priority (optional), Target Completion Date, Person Responsible and Functional Group / Department.
|
|
The person responsible must be a user of the system as they will be emailed an alert. Consult EHS Department if the appropriate person’s name is not in the list.
Tasks for a particular Corrective Action appear on the Action page under the Action details. They do not appear on the Incident page. |
6. To complete an Action, find & open the Action & click on Complete Action. Enter a closing comment, a date to review the effectiveness of the Action and select a Reviewer.
|
|
The Effectiveness Review is carried out to determine whether or not the Corrective Action was successful. If it was not then a further Action should be raised.
Finding Actions is similar to finding Incidents:
Workspace displays any actions & tasks assigned to you (the user). Overdue actions & tasks are also displayed on the START (welcome) page and the Responsible Person will also receive emails.
|
|
|
Actions cannot be completed until all related Tasks have been completed. |
7. To add attachments open the Action as described earlier and click on Add Attachment.
|
|
Choose the type Attachment to browse for a document and upload it into SCANNELL. However if the document is confidential choose the type External and type in the URL/address of the document which should be on a restricted access drive. This will not be uploaded and will ensure that it can only be accessed by users who have been authorised by the IT Dept. to access the drive in question.
When using the External option you must type in the full path e.g. for a website: http://site name/page … or for a document: file:\\Network drive:\foldername\filename.filetype e.g. file:\\Z:\Environmental\Report.doc.
Contact the IT Dept for if you are not sure of the correct address for the file in question.
The Name & Description of the document entered will be displayed in the link e.g. Incident Investigation Report No. 123 [Name] - Prepared by J Bloggs on 29 Jan 2007 [Description].
You can remove documents from being displayed by un-ticking the Active checkbox. |
8. Once an Action is closed and the designated review date has been reached, the person who was made responsible for reviewing the effectiveness of the action will be notified by email. This person can Open the Action and click on Add Evaluation Review Note link. If the Action was found not to be effective a further Action must be raised.

