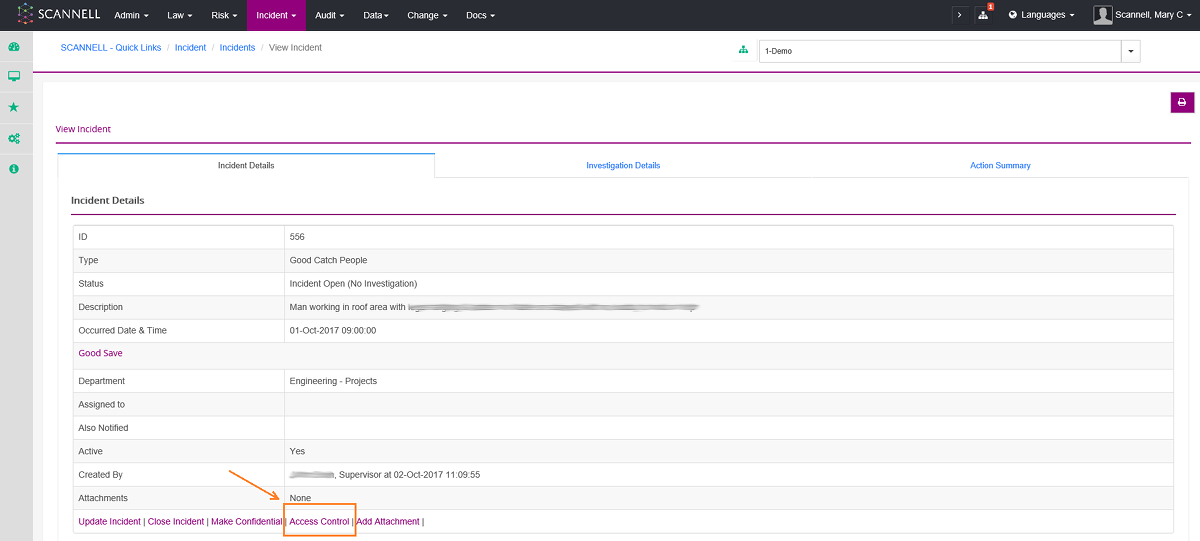
It is possible to restrict access to an incident to allow specific users of the incident. This is controlled through the Access Control option, available once the incident has been recorded.

By selecting either a user(s) or group(s) from the list it is possible to restrict access to just these users/groups.
By default, users assigned the incident and users with the Management/ Confidential Access right are not restricted access to the incident.
Recording an Investigation
|
|
Where appropriate an incident can be closed without an investigation using the Close Incident Without Investigation link.
|
1. Log onto SCANNELL using your User Name & Password.
2. Find the appropriate Incident in the database using the Menu options in the View panel on the right hand side.
a. Workspace displays any incidents assigned to you (the user)
b. Search for Incidents allows you to search based on various search criteria – use the scroll bar on the right of the page to see the results which are displayed on the lower part of the page.
|
|
If you were notified of an Incident by email you can click on the link in the message and this will take you straight to the incident after log on. |
3. Click on the Incident Id to open it and on the Update Investigation link (in the Investigation section below the Incident Details – use the scroll bar if necessary) to record the Investigation
|
|
Only certain users have access to record an investigation. The link will not appear unless you are authorised. Contact the EHS Dept. if you have a query about this. |
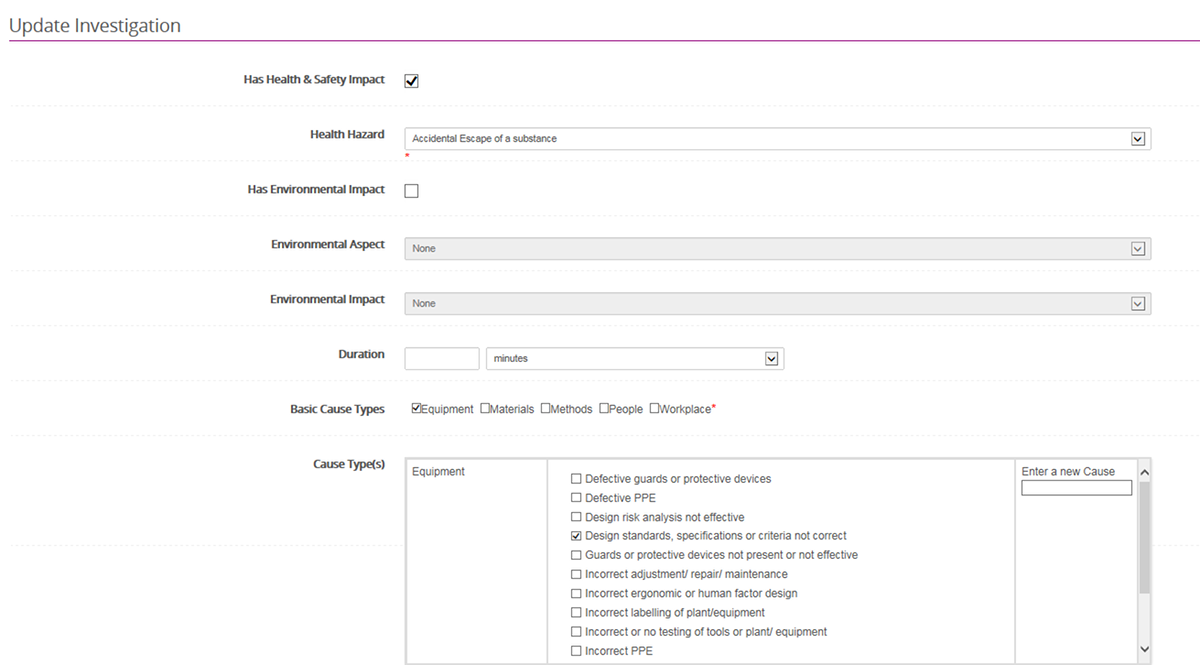
4. If the
Incident had a Health & Safety Impact tick the box and select an
appropriate hazard group.
5. If the Incident had an Environmental Impact tick the box and select an appropriate Aspect & Impact
|
|
If you have the LAW Module, once the incident is saved you can view Checklist Items related to the Incident based on the Hazards or Aspects chosen.
An incident such as a fire or chemical spill may have both Environmental and Health & Safety consequences |
6. If applicable specify the Duration of the incident in minutes, hours or days.
|
|
Typically this will only apply to Environmental Incidents. |
7. Basic Cause Types - Choose one or more of the basic cause groups (Equipment, Materials, Methods, People and Workplace). Each of these will display a list of possible causes. Tick one of more of these.
|
|
Consult the EHS Dept. if an appropriate cause is not listed. Certain users can add Causes.
|
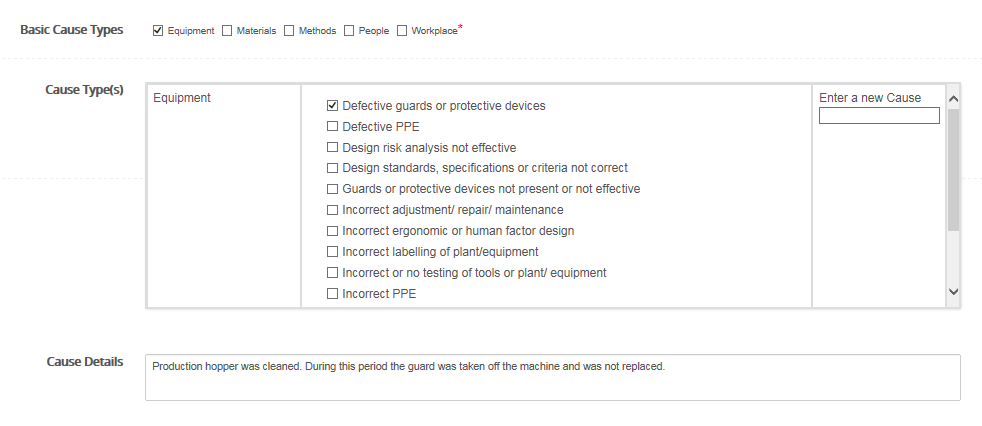
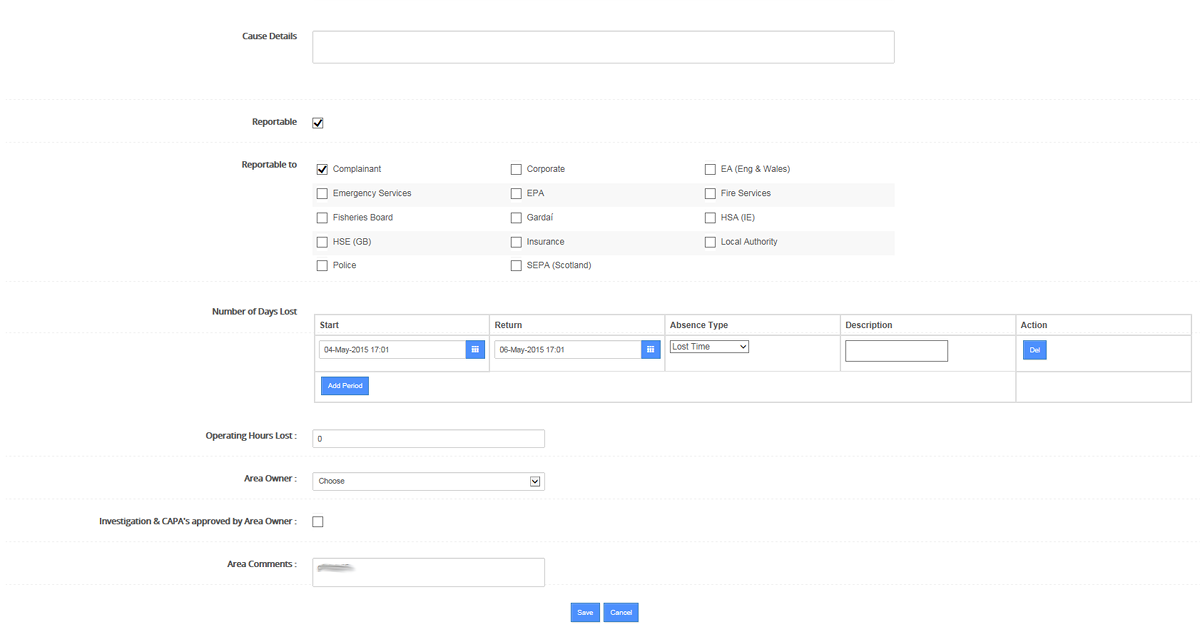
8. Cause Details - enter details supporting the selection of the cause(s) above. Identify the root cause if known.
§ Example: In the case of an incident involving someone slipping on a wet floor the direct cause was the wet floor, however the root cause was found to be inadequate maintenance procedures that led to the floor being wet.
9. You may refer to an Investigation Report or another document and add this as an attachment (see below).
10. Reportable to - Tick the Reportable Box and then tick the appropriate internal or external groups or persons to whom the incident has been reported - Head of Department, Team Leader, Supervisor, Corporate, Insurer, Health & Safety Authority (HSA), Environmental Protection Agency (EPA), Local Authority (Cork County Council), An Garda Siochana, etc.
11. Click the Save button.
|
|
You must choose or enter information where the fields are marked with a red asterisk *. |
12. The Investigation can be corrected or added to by subsequent authorised people and a history is maintained by the system.
13. To add attachments open the Incident as described earlier and click on Add Attachment.
|
|
Choose the type Attachment to browse for a document and upload it into SCANNELL. However if the document is confidential choose the type External and type in the URL/address of the document which should be on a restricted access drive. This will not be uploaded and will ensure that it can only be accessed by users who have been authorised by the IT Dept. to access the drive in question.
When using the External option you must type in the full path e.g. for a website: http://site name/page … or for a document: file:\\Network drive:\foldername\filename.filetype e.g. file:\\Z:\Environmental\Report.doc.
Contact the IT Dept. for if you are not sure of the correct address for the file in question.
The Name & Description of the document entered will be displayed in the link, e.g. Incident Investigation Report No. 123 [Name] - Prepared by J Bloggs on 29 Jan 2007 [Description].
You can remove documents from being displayed by un-ticking the Active checkbox. |
14. Once the Investigation is complete it should be closed by clicking on the Close Investigation link on the Incident display page. You must select whether or not Action was required and enter a closing comment.
15. Click the Save button.
|
|
A closed investigation can be re-opened at a later stage.
|
Additional Information:
The system also allows additional information to be
entered (If applicable):
§ Number of Days Lost (Dates, Absence Type, Description and Action).
§ Operating Hours Lost.

