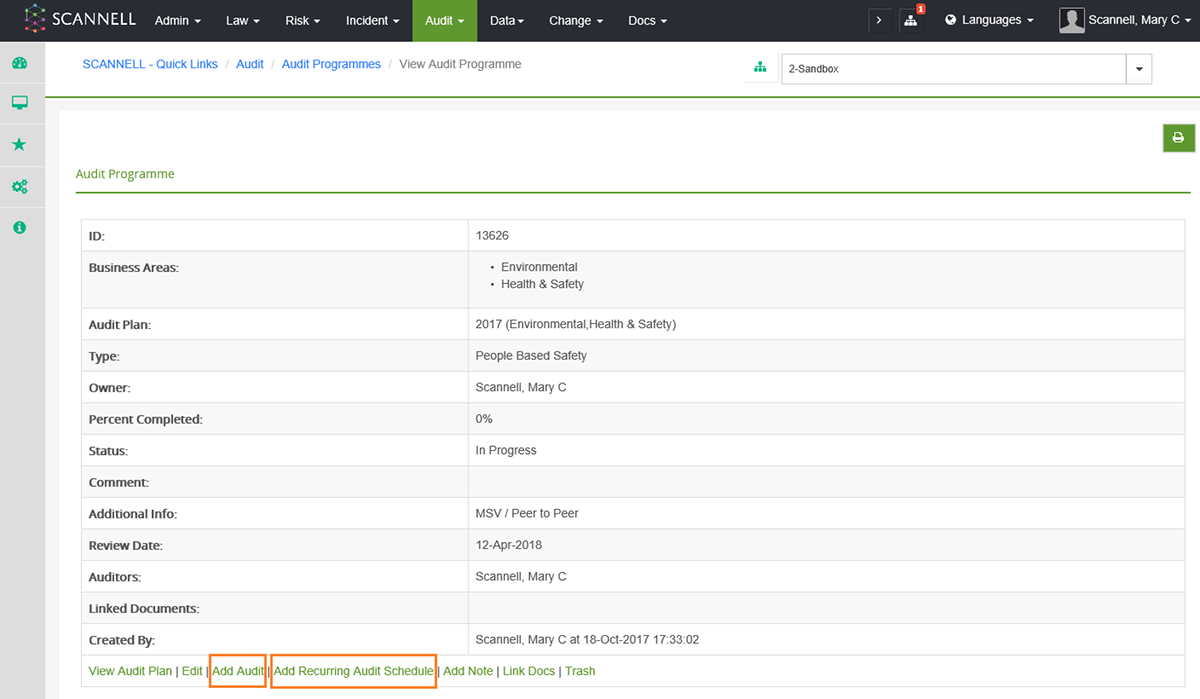
Audits are associated with an Audit Programme and can only be added against an existing programme.
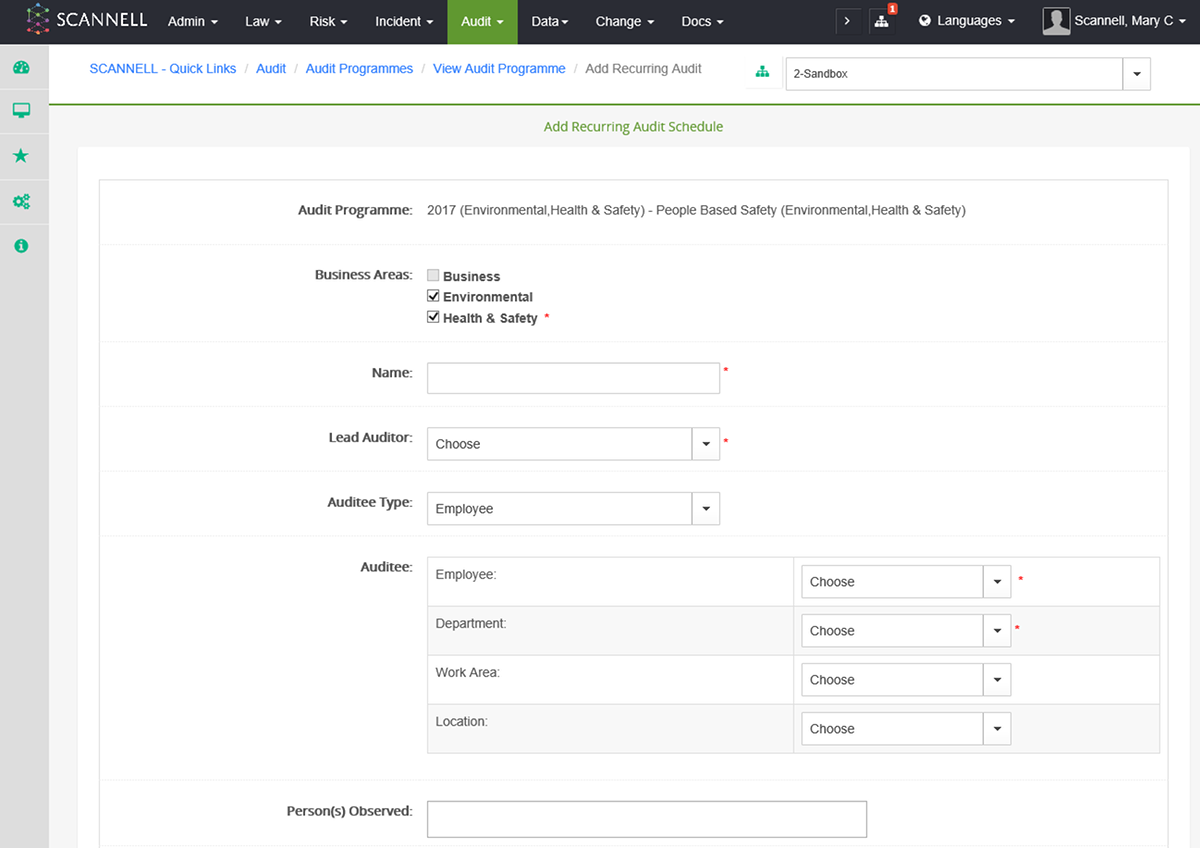
To manually schedule an audit select Add Audit. To create an audit that will be repeated periodically, select Add Recurring Audit Schedule.
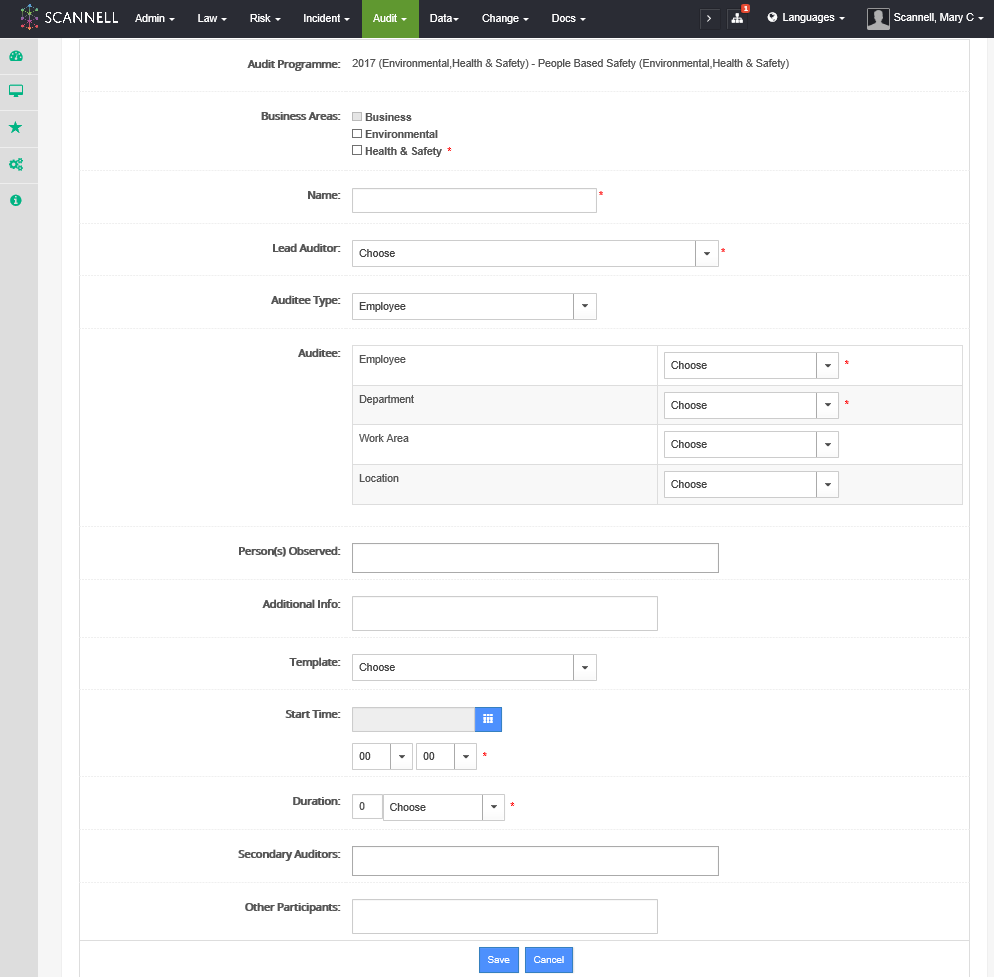
Add Audit page:
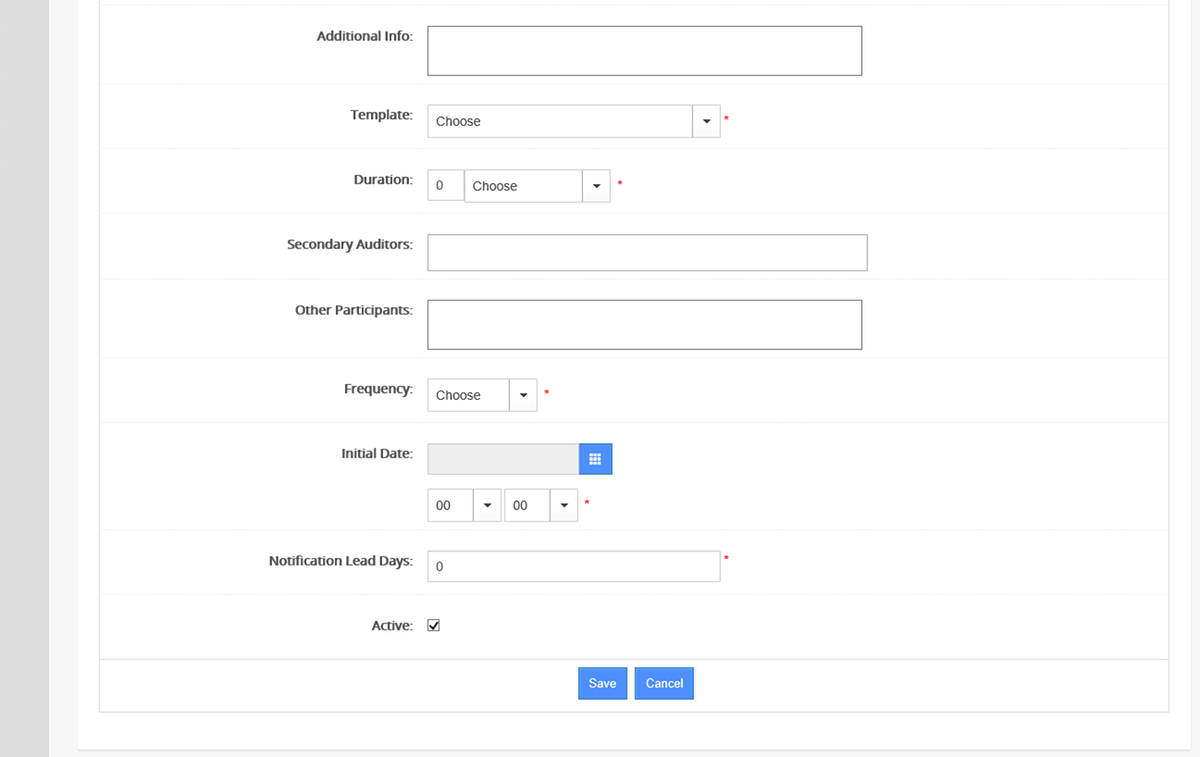
Add Recurring Audit Schedule page:
|
|
Before you can add an Audit there must be an existing Audit Programme and in most cases an existing Audit Template. |
1. Select a pre-defined Audit Programme from the Audit Programme list.
2. Click on its name to open it.
3. Click on Add Audit.
4. Enter a name for the Audit.
9. Select the Lead Auditor (the main person who is responsible for the audit) from the dropdown list. This list is determined by Access Rights set up in the ADMIN Administration module.
5. Select whether you are auditing an Employee or Third Party (external).
a. Select Employee Name and Department.
b. Select an existing Third Party or Add a new one.
6. Enter any Person(s) Observed and any relevant Additional Information.
7. Select an Audit Template.
8. Select a start date using the Calendar Icon/Tool and a time using the drop down options.
9. Enter a duration (number) and select minutes/hours/days.
10. Select any secondary Auditors taking part.
11. Enter details of any other participants.
12. Save.
Those involved will receive an email regarding the
scheduled audit and will appear in their Workspace.
To Search for Audits click on Audits in the Views Menu and select Display Search.
Various filter options are available, including the Auditor, Auditee, Department & Dates.
Once an Audit is created you can:
•View the associated Audit Programme.
•Add Notes.
•Print a Hard Copy of the Audit Questions.
•Once completed, print an Action Report (Questions, Findings & Actions).
•Copy as a Recurring Audit (this allows audits to be automatically scheduled, for example monthly, and to carry on beyond a single plan year).
•View History.
